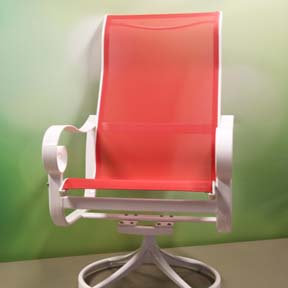
How To Install New Slings For A Patio Sling Chair
Replacement Sling Installation Instructions for a One Piece Patio Sling Chair
View the video above or follow the step by step instructions below.
This is a tutorial of a basic replacement sling installation for a one-piece patio sling chair. Your installation may vary as no two patio sling chairs are made the same. Installation of replacement slings is not without risk. Injury may occur during a sling installation or furniture may be damaged in the process. For this reason, we recommend professional installation as the best option when at all possible. Not every patio sling chair is installed in the exact same way. This patio sling installation tutorial is just a guideline to help you through the sling installation process. If you need some assistance or some basic moral support, just contact us. Our sling installation experts have done and seen it all. We are here to help you through the sling installation process.
List Of Basic Tools For A Patio Replacement Sling Installation
- Hammer
- Pliers
- Wire Cutters or Scissors
- Utility Knife
- Flat Head Screwdriver
- Watered Down Dish Soap in a Spray Bottle
- Penetrating Oil
- Spouse/Significant Other/BFF for assistance
![]()
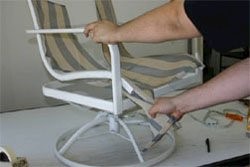
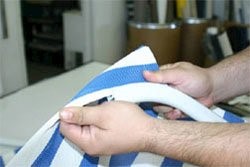
- Take careful note of how your patio sling chair comes apart. If you own a digital camera it would be beneficial to take photos of your patio chair before disassembling.
- You MUST completely disassemble your patio sling chair to install the new sling. You can not install the new sling by just loosening the bolts that hold the rails to the frame. The rails must come all the way off to make installation easier.
- Please do not compare the size of your new sling to your old sling. The new patio sling will seem like its too small. Do not worry. The patio sling fabric has tons of stretch to it. If you follow our instructions, the sling fabric should end up tightly stretched across the patio chair frame. We understand that it does not seem logical for your new patio sling to be a bit smaller than your old one. We got this! Promise! Your old sling fabric has stretched beyond its limits and is probably dry and brittle. The new sling has a ton of stretch to it. Some patio sling fabrics have more stretch than others and we take that into consideration when we determine the cut size and final size of your new replacement slings. Might take a little elbow grease and your BFF, significant other, or a local handy man to get it installed, but we know you can do it. Just contact us if you need some guidance. Our sling installation team is ready to assist!
- Kindly try to INSTALL before you CALL
1 – Remove the Old Plastic End caps on the Patio Sling Rail
IMPORTANT! As we mentioned, you need to disassemble your patio sling chair to get the new fabric patio sling installed.
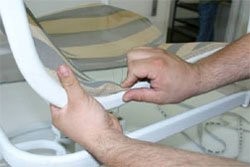
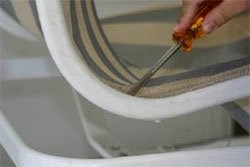
Using a flat head screw driver or pliers, gently remove the plastic end caps from both ends of the sling rails. Be careful when removing your old end caps, they are often dry, brittle and break easily. We have a wide selection of common patio sling rail end caps that you can order to replace your current sling rail end caps.

2 ~ Remove the Old Sling Material from the patio chair frame
The easiest way to remove the old patio sling is to slice it down the middle using a utility knife or heavy-duty scissors. If you choose not to destroy your old slings by cutting them in half, unbolt both sling rails before proceeding.
IMPORTANT! No need to keep the plastic sling rod or spline. Your new patio chair slings include new supple sling rod as part of the package. Your old sling spline is likely too dry and brittle to reuse again. It will be very hard to rethread the spline into the sewn rod pocket of your new replacement slings.
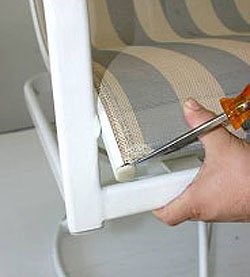
It is not uncommon for the sling to be wedged inside the sling rail. Using both hands, break the sling free by pushing it back inside the sling rail. Due to the weight of the body sitting on the old patio sling fabric, the fabric and plastic sling rod has become wedged up to the top of the opening of the rail. This in combination with dirt and debris, makes the edge of the sling fabric feel sort of glued into place. To help loosen the sling and fabric, spray some watered-down dish soap, like Dawn or Palmolive along the entire length of the sling rail. Give the soapy mixture a couple of minutes to work its magic. It needs some time to absorb into the rail and start dissolving the dirt and oils that are sticking to the fabric.
HELPFUL TIP! If the old patio sling fabric is being stubborn and does not want to detach from the sling rail, break the fabric loose with a flat head screw driver. Push the patio sling fabric down into the sling rail with the flat end of the screw driver.
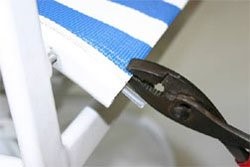
The old dirty fabric should slide out the bottom end of the sling rail with ease. Grasp the sling by hand or using a pair of pliers and strip it from the sling rail. Have someone hold the patio sling chair in place while another person pulls the old fabric out of the rail. Teamwork! Teamwork! Teamwork!
![]()
3~ Remove the Bolts from the sling rails.
IMPORTANT! Keep your hardware for the reinstallation process.
The sling rails are what holds the edges of the new patio sling fabric along with the plastic rod or spline that is threaded into the rod pockets on your new patio sling.
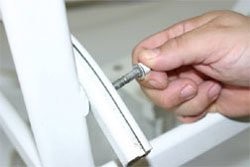
One or both of the sling rails will be attached to the main body of the patio sling chair frame with bolts. The bolts go through the sling rail and into the chair frame. Using the appropriate tool, remove all bolts (typically 4-6) from the patio chair frame. If your bolts prove difficult to remove, spray them with a penetrating oil (Liquid Wrench, NAPA 6300). The oil will help to loosen any rust or corrosion on the bolt. Let the oil soak for at least an hour before proceeding. Save bolts and any other hardware for reinstallation. If your bolts are bent or rusty it is a good idea to replace them.
IMPORTANT! – Do not force the bolt out of the frame. You risk breaking the bolts and possibly stripping out the threaded inserts, which will result in additional repairs to the frame.
4 ~ Insert the Sling Spline or Plastic Sling Rod
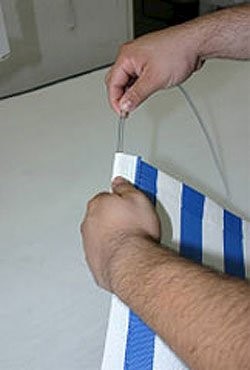
The new replacement slings will be shipped without the plastic sling rod or sling spline installed. Insert the sling spline into each side of the sling. The sling spline will be longer than necessary; do not trim away the excess until later in the installation process. If you are having trouble inserting the sling spline, try sharpening the end in a pencil sharpener. Insert the pencil into the opposite end of the sling or the end you are pushing toward. The pencil or pen will be pushed out the end by the sling spline and not get caught on the inner hem. Tah Dah! Sling spline installed. Happy Patio Sling Customer.
5 ~ Insert the new replacement sling fabric and spline Into the Sling Rails
Before sliding the sling into the rail, make sure the rails are in the same position as they were before they were removed. Slide the fabric through the sling rails making sure to keep the tag at the top of the chair as this differentiates the top and bottom of the sling.
6 ~ Start the Bolts through the sling rail and into the patio chair frame.
Place the sling rails with the newly installed sling onto the chair frame. Line up the holes and finger-tighten all of the bolts.
IMPORTANT! Do not tighten the bolts all the way. You want to work your way around the chair and tighten each bolt a little bit at a time, so the bolts tighten into the sling rails as the same rate. DO NOT fully tighten the bolts at this time.
DO NOT Tighten one side of the sling rail all the way!!!! You will never get the sling stretched to the other side!!!!

7 ~ Tighten Bolts
Starting with the bottom of the chair, pull the sling until it is even with both sling rails. Once the sling is flush with BOTH sling rails, tighten only the two bottom bolts. This will keep the bottom of the sling tight and in place.
This step is AFTER the hand tightening process described above.
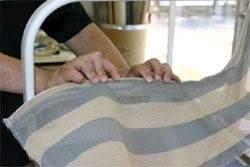
8 ~ Stretch the Sling Material from the top and bottom
Eliminate any wrinkles left in the bend of the seat by stretching the fabric upward. You can use a pair of pliers to help stretch and pull the fabric through the sling rails. Careful not to pull so hard that you tear your sling fabric.
Note: It may be helpful to use a pair of clamps to hold the fabric as it tends to slip back down the sling rail. If you do not have clamps available, having someone to help with this step may prove useful. Position yourself behind the chair. Using pliers, stretch the sling upward to the edge of the sling rail so that both fabric and sling rail are even. At this point, use clamps or have someone hold the sling in place while you tighten the remaining bolts. The sling should now be tight and free of wrinkles.
9 ~ Install Spreader Bar
If your chair was equipped with spreader bars they must be reinserted. Flip your chair upside down being careful not to scratch the arms. Try bending the spreader bar over your knee just enough to allow the spreader bar to fit in to place.
If you cannot bend the spreader bar, a spreader tool will be needed to spread the slings rails apart allowing room for the spreader bar. If needed a spreader tool, it can be ordered, just contact us.
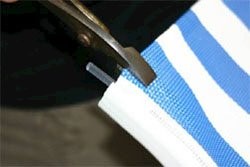
10 ~ Cut Excess Spline and Re-Install End Caps
Cut all excess sling spline with scissors or pliers and re-install end caps into sling rails by carefully tapping them in with a rubber mallet.

Note: Please try to install your slings before you contact us. New slings install snug and a certain amount of pushing and pulling is necessary to get the proper fit. If you are having a lot of trouble please consider purchasing one of our spreader tools.
Back to Home